
Hiring through Folio
Folio provides all the tools you need to post jobs, manage interview processes, onboard new talent, and pay your talent.
Job Postings
To view your team's active jobs, from the left sidebar select Jobs > Job Postings. Here you can see the macro view and status of your team's job postings: you’ll be able to see the status of each job listing, how many candidates have applied for each role, and who has been hired.
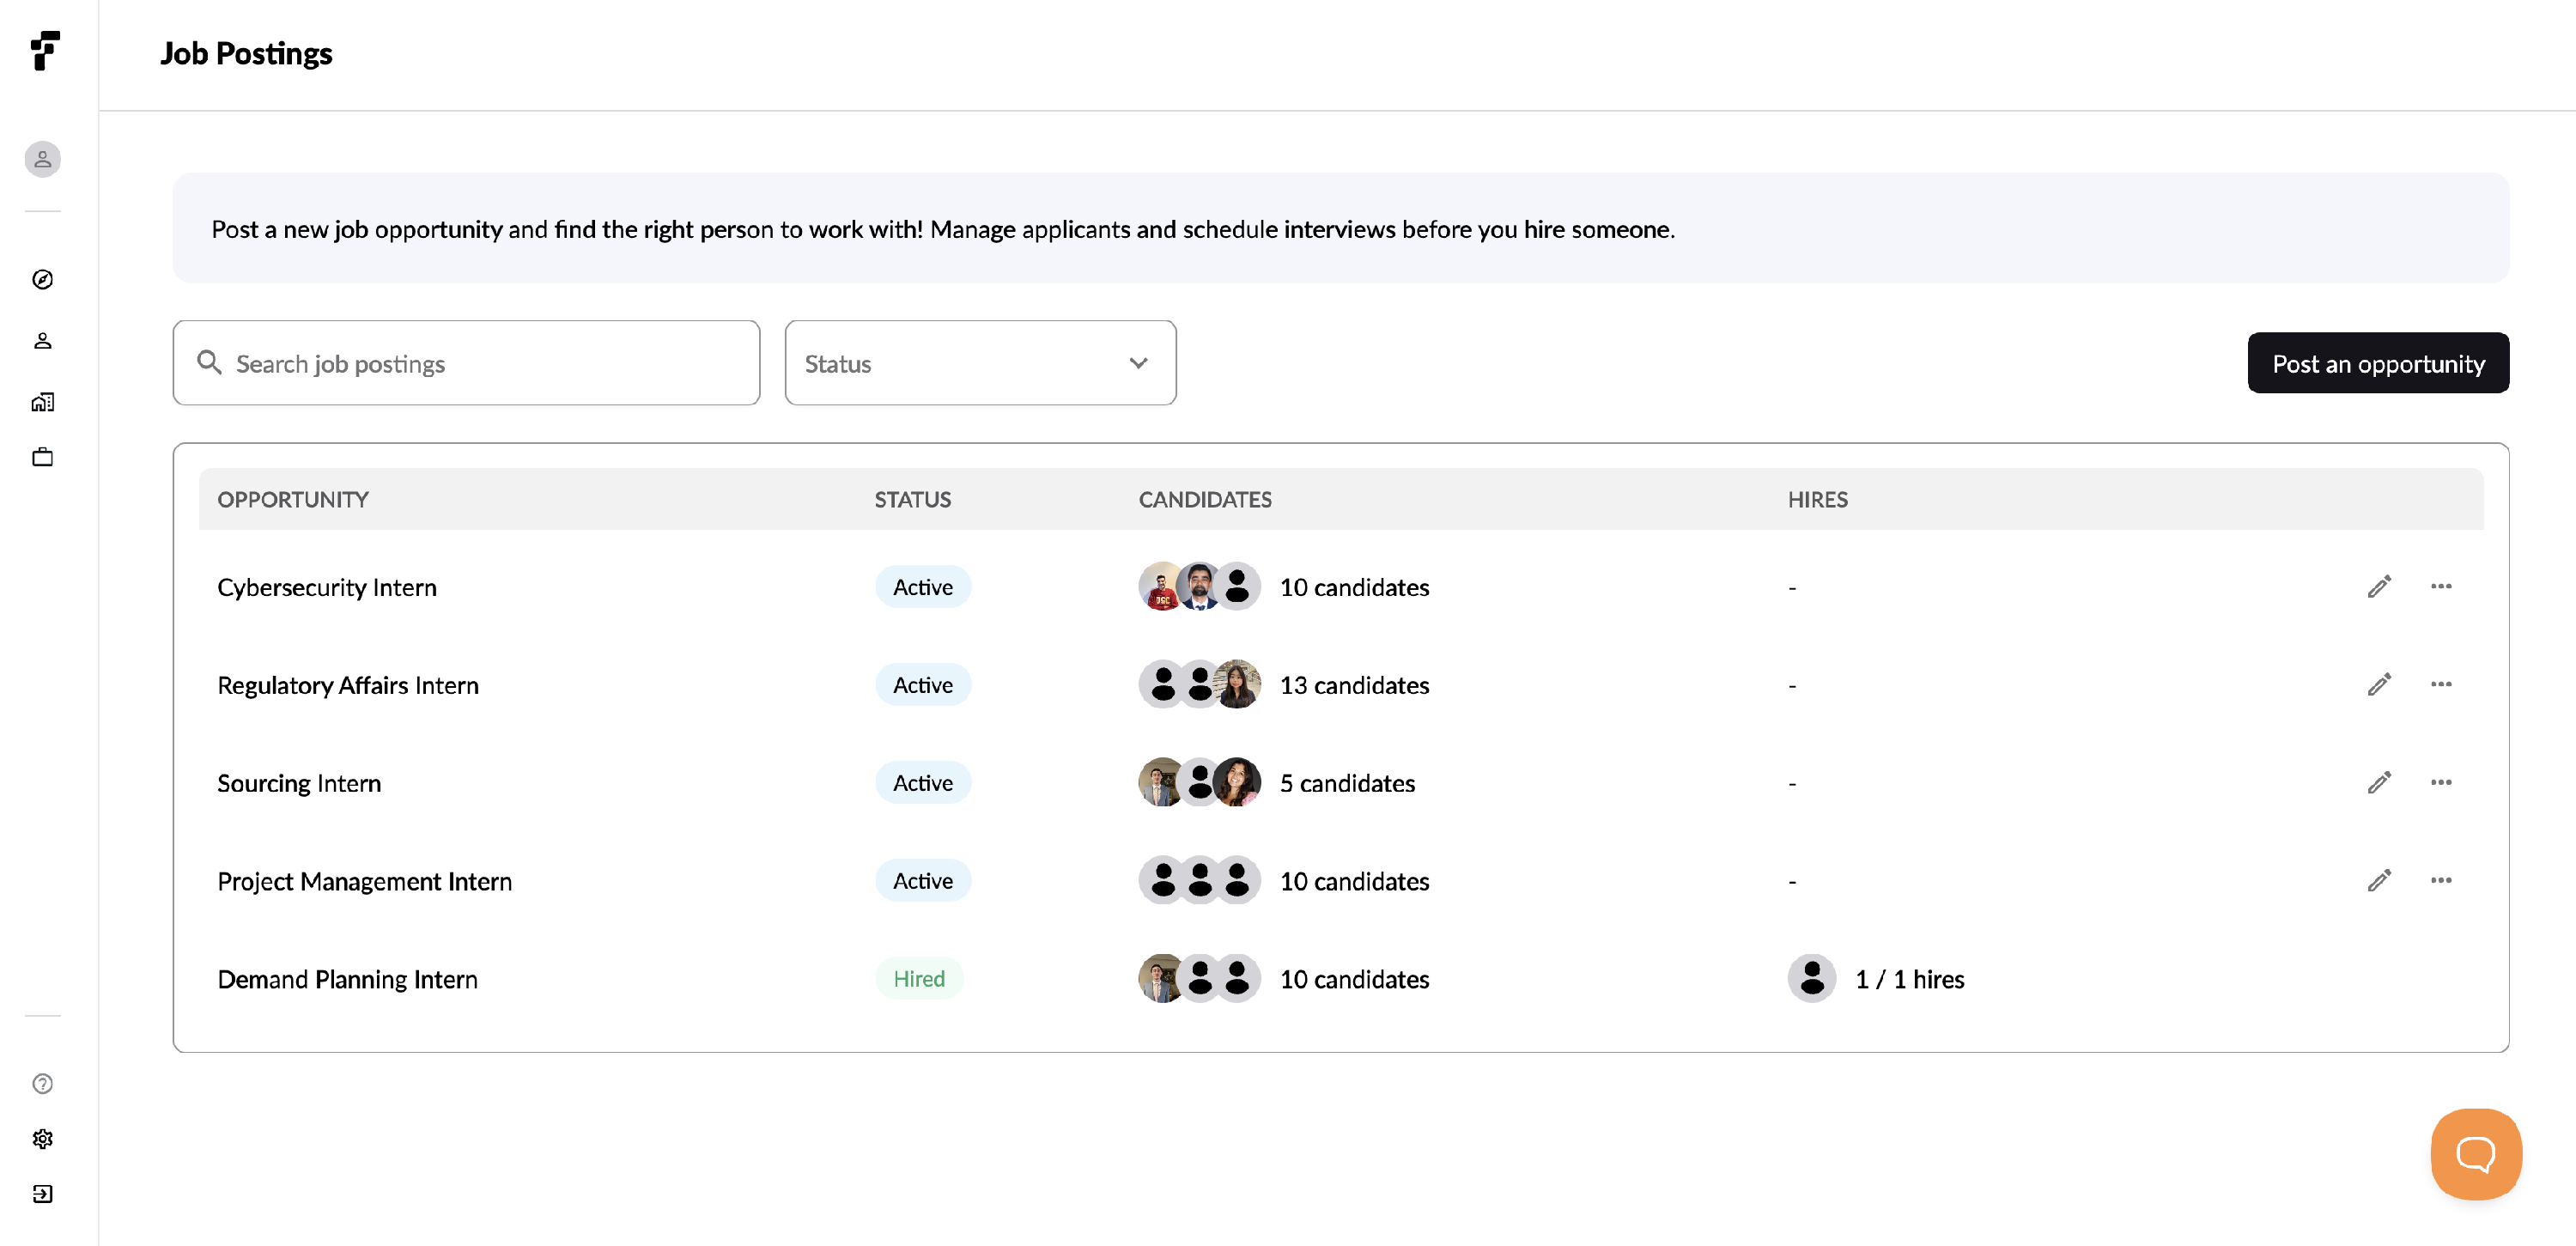
A job listing can be drafted, active, paused, or hired.
Drafted: This job listing is not published on the Folio Platform yet.
Active: This job listing is published on the Folio Platform, and talent can apply for this position.
Paused: This job listing was active, but hiring has been paused for it. It’s no longer published on the Folio Platform, but you can still see who applied to it when it was active. You can re-activate a paused job listing at any time.
Hired: Talent has been hired for this job listing. It’s no longer published on the Folio Platform.
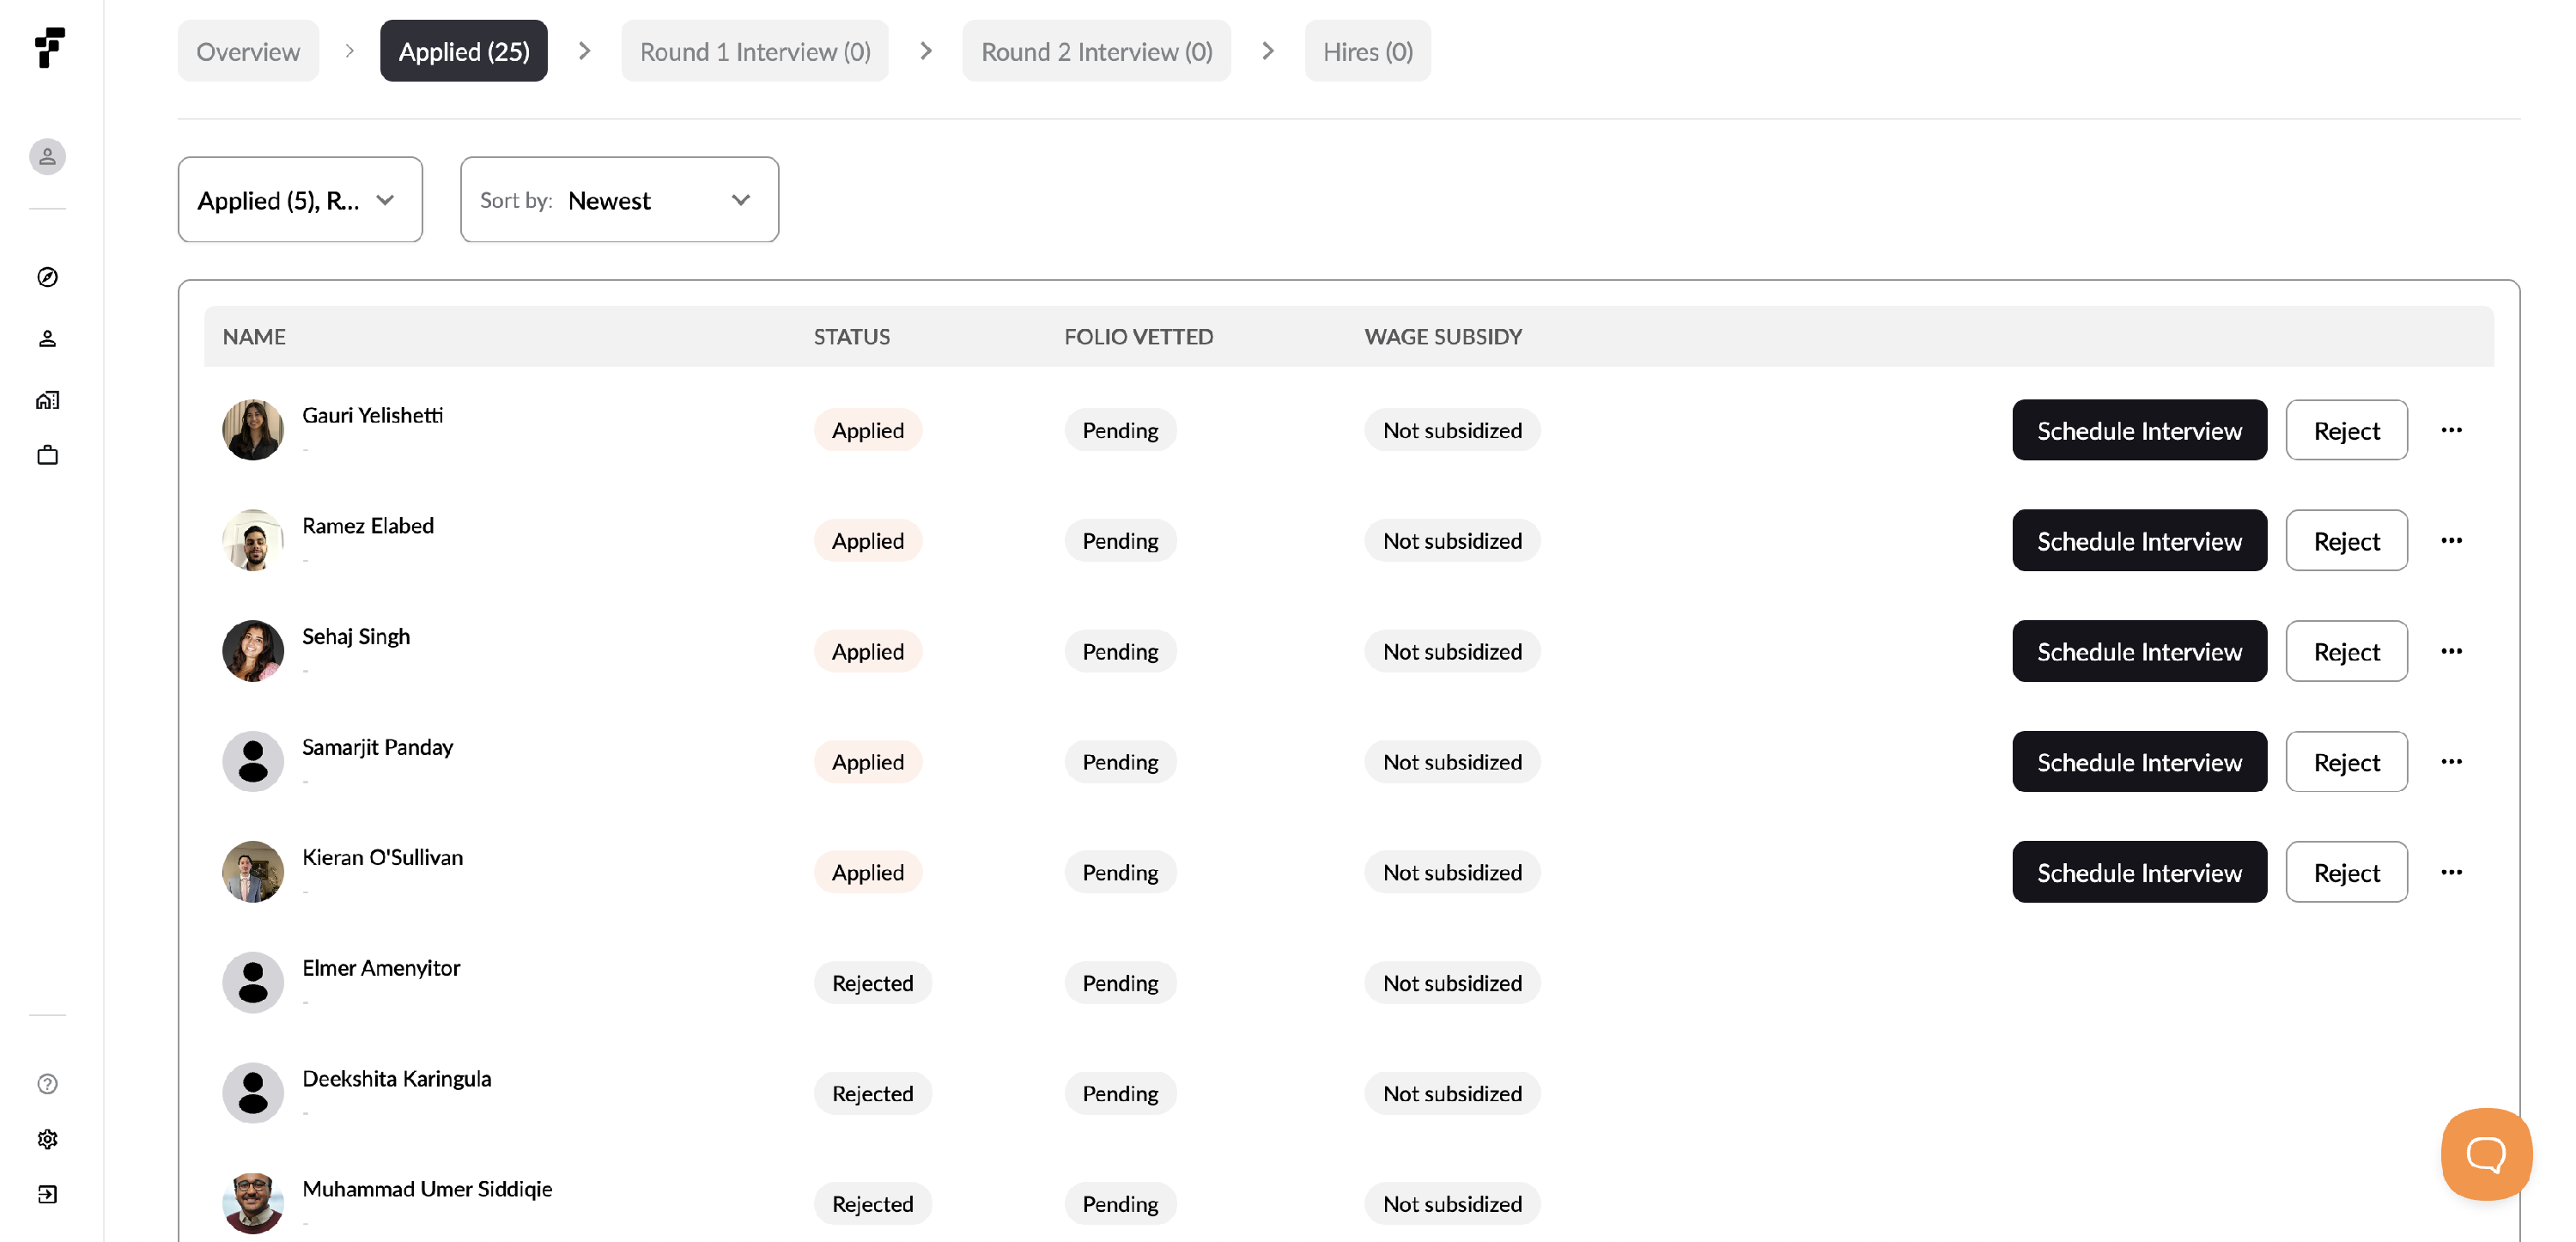
Managing Applicants
To see who has applied for the job listing, click the Applied tab within the listing. Here, you can see each applicant’s name and their status (either Applied or Rejected). To view an applicant’s Folio profile, simply click on their name.
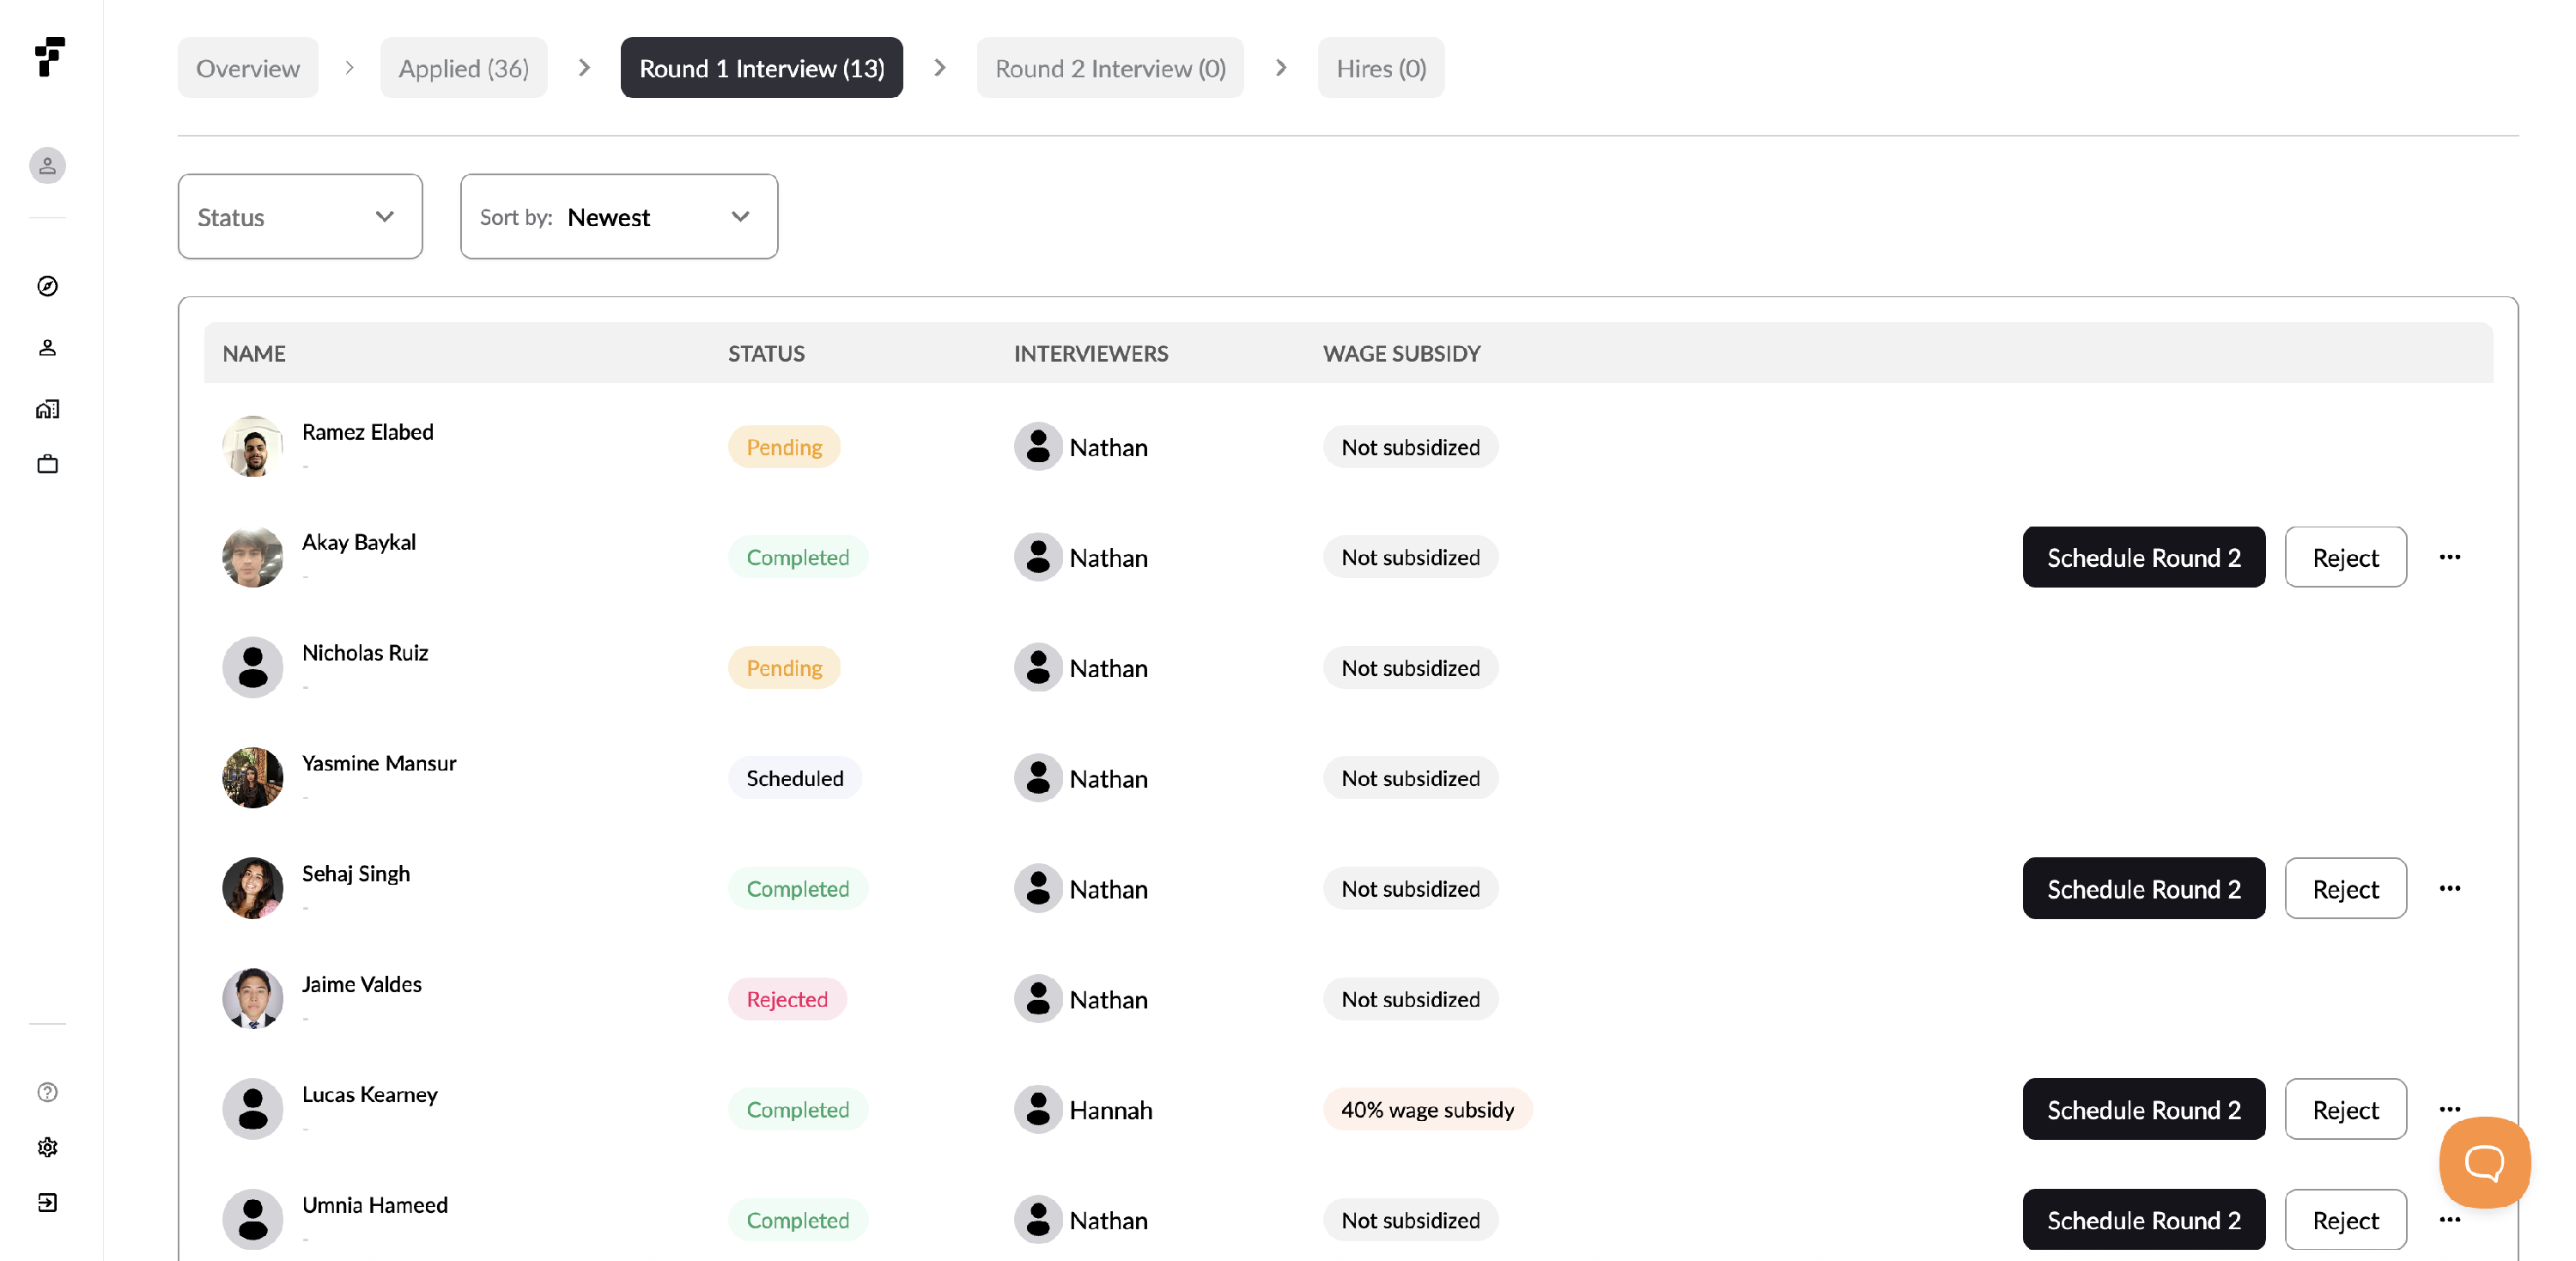
Interviewing and Hiring
In the Interviewing section, you'll have the option to either hire or decline a candidate. Folio will automatically handle communication by sending emails to inform candidates of their application status based on your decision.
If you decide to hire a candidate, the next steps involve confirming project details, creating an onboarding plan, and finalizing the process by clicking Confirm. To confirm project details, review the job listing in the dropdown menu to ensure that the budget, timeline, and responsibilities align with the expectations for the candidate you plan to hire. After that, attach any necessary onboarding materials, such as additional contracts (like NDAs), company informational documents, or a Slack invitation.
If you need to add or update onboarding materials, simply click the Add onboarding step button located in the top right corner of the screen.

After you’ve added an onboarding plan for your talent, you’ll confirm that you’re ready to hire your candidate, and you’ll be off and running! Your hired candidate will now appear in the Hired tab of this job listing, where you’ll be able to view their contract for the project.
Reviewing Timesheets and Paying
Students will submit timesheets on a regular basis, typically every week or every other week. You can head to the Jobs > Contracts section from the sidebar to see active Contracts and recently submitted hours. Under the Tasks tab, select the student's name to see their recently submitted hours. If approved, select the dollar icon on the right to process payment.
If this is your first time paying a student, you'll be prompted to add your credit card to your account. Folio uses Stripe for secure credit card storage and processing.
Last updated